Teaching you how to build and launch a shiny new website or a blog using WordPress is what we’re all about here at WebsiteSetup.org.
Keep in mind that this is a follow-up guide for those two WordPress tutorials:
This guide also assumes that you’ve already installed WordPress to your domain via WordPress web hosting. If you haven’t done yet, here’s a primer for Bluehost (a hosting company that I recommend).
What Can I Do With WordPress?
Let me be honest with you, WordPress is a brilliant platform for creating websites and blogs. It’s relatively easy to master, it packs a ton of features, and on top of all that, it’s also really customization-friendly, so to speak.
In other words, if you want to change anything about it – and I do mean anything – WordPress allows you to do so in one way or the other.
The following guide covers a lot of ground, and gets you through the process of WordPress customization from start to finish.
Let’s begin with:
1. Once You’ve Installed Your WordPress Website (or a Blog)
Okay, so at this point, you have your website launched – as in, made available for the world to see – you have your WordPress theme selected, and everything looks more or less like you imagined it.
So now is the time to take care of some important, yet not that obvious steps that will help you make your site look exactly like you want it, make it safer, easier to manage, and optimized for the search engines.
Here are the individual steps:
1. Set permalink structure
Or rather, set correct permalink structure.
The thing is that WordPress comes with default permalink structure out of the box, but it’s not the most optimized one. That’s why you should fix it right upon making your site available to the world.
If you go to your wp-admin / Settings / Permalinks, you’ll see this:
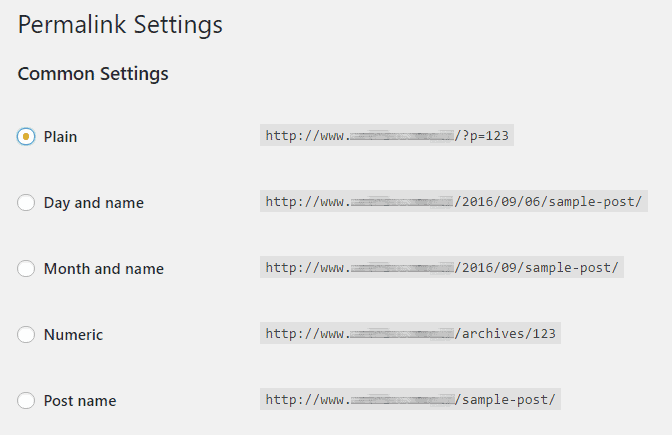
This “Plain” permalink structure doesn’t let you create descriptive URLs for your posts and pages, which is bad not only for SEO, but also for your visitors. Change that setting to the one labeled “Post name” (visible above).
2. Make sure the site is visible to Google
This is a quick check, but a very important one, if you want your website to ever rank in Google for any keyword.
Go to your wp-admin / Settings / Reading, and make sure that the following checkbox remains unchecked:

3. Get site backups taken care of
Backups are always your most important asset in case anything bad happens to your site.
Who knows, maybe one day your hosting platform fails and you’ll lose the site temporarily. Or maybe it falls victim to a hacker’s attack. Those things sometimes happen, but they are less painful if you have a working backup stored someplace safe.
The easiest way to have this taken care of is to install a backup plugin, and then let it work on autopilot – backing up your site every day without your supervision.
For a free solution, try out UpdraftPlus. For a top-tier solution – one that also offers a range of additional security features – go with VaultPress.
4. Enable traffic analytics
As a website owner, you need to know how many visitors you actually have at your site, and how they are accessing it. But that’s only the tip of the iceberg. There’s so, so much more that you can learn about your people.
Luckily for all of us, the most in-depth analytics tool is available for free. I’m talking about Google Analytics.
You can hook it up to your site by going to Google Analytics’ official website and following their getting started guide.
To make the final integration steps easier, get the free MonsterInsights plugin.
5. Get a security plugin
In all of WordPress’ glory, it’s also a platform that’s often a victim to hacker attacks or malicious software that tries to take advantage of various security holes in one way or the other.
Unfortunately, due to WordPress’ popularity, those attacks happen more often each year. Even though the platform itself is not what you’d call bad in terms of security, we can still make things a lot better with an additional security plugin.
The one I recommend is called iThemes Security – a free plugin. The good thing here is that it offers most of its magic right out the box, so there’s nearly none initial setting up to do.
6. Enable caching and connect to a CDN
Those two technologies usually go together, since they both impact the performance of your site and its speed – the time it takes to deliver the site to your audience.
In short, when a visitor enters the address of your site into their browser bar and presses Enter, a lot of things happen. Many of them can be optimized to effectively make the waiting time shorter. And that indeed matters. For instance, it’s reported in a study that 47% of people won’t wait longer than 2 seconds for a website to load … where by “won’t wait” I mean that they will leave and go to some other site instead.
Caching and CDNs are two of the most effective ways to fix that.
First, caching. In itself, it’s a fairly boring topic, but its core is that it takes some of your website content and stores it in a way that allows that content to be served quicker when the next visitor asks for it.
A CDN stands for Content Delivery Network. Basically, it’s a network of servers that take your site’s static content (such as images or other content that doesn’t change that much) and deliver it to your visitors from the server of the nearest geographical location.
Now, how to get all that goodness:
- Caching is something you can enable by installing a plugin called W3 Total Cache (free). It works mostly on autopilot, so there’s no need to go through its many pages in the WordPress settings menu (but I still recommend you at least read them to find out what’s possible).
- When it comes to a CDN, I have two alternative recommendations (get just one):
- If you’re looking for a free solution: CloudFlare (suitable for new WordPress sites).
- If you don’t mind investing in your site performance: KeyCDN (great even if your site starts growing in the future).
I urge you to read some more about both of these topics. All the solutions recommended here do quite a bit of explaining in their documentations / website materials.
7. Create new user accounts
After the initial installation of your WordPress site is done, you end up with a single user account – the main administrator account.
First order of business: make sure that the username is secure.
Yes, the username. We’re not even getting into the passwords yet.
Long story short, if your username is anything like “admin”, or “siteadmin”, or “administrator”, or anything like this, it is poor for security and you need to scrap it!
To do this, you actually need to go to wp-admin / Users / AddNew, and add a completely new Administrator user account. Only this time, make the username not obvious.
Delete the old admin account once you have the new one added.
Second order of business: make sure that your password for the admin account is safe. Here’s a great quick guide on that.
Third order of business: create a separate Editor account for yourself. This account you will use for all content creation/editing purposes. An approach like that is much safer than using your admin account for everything. This way it’s less possible to mess something up by accident.
To do this, go to your wp-admin / Users / Add New again, and create a completely new account selecting the user role of Editor:

2. Customize Your Theme
This part is probably the main thing on your agenda when it comes to launching a WordPress site that fits your needs 100%.
I mean, with every WordPress theme, no matter how quality it is and what awesome features it offers, there’s always something. There’s always that little, or slightly bigger, something that you’d like to change before you can honestly call the final result “yours”.
And that is exactly what we’re discussing in this section of the guide.
1. The limitations
First things first, the individual customizations that we’re just about to go through, won’t be available in every single WordPress theme on the market. Basically, your specific theme selection will highly impact your ability to follow through with certain changes.
Unfortunately, old themes, or themes that haven’t been updated in a while, won’t have that much to offer you in the realm of customization. For new and/or modern WordPress themes, this isn’t an issue.
Note. If you feel that your theme might not be up to par, and that you probably could use something that’s slightly more in tune with the modern standards, feel free to visit our other guide, and go straight to point #5.
2. Understanding the WordPress Customizer
In short, every modern WordPress theme allows you to customize various details of its appearance and features through the built-in WordPress Customizer – it’s available in WordPress right out the box.
In other words, many of the customizations we’re presenting in this guide involve the Customizer in one way or the other. That’s why it’s important to get yourself familiar with it.
You can access the Customizer by going to wp-admin / Appearance / Customize. This is what you’ll see in the left sidebar:
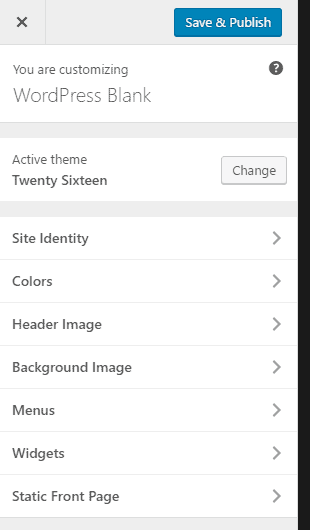
On the right-hand side, there’s the preview of your site – it changes in real time as you do any modifications.
Depending on the theme you’re using and the plugins you have installed, you’ll see more or fewer modules in the Customizer’s sidebar, so don’t worry if your sidebar doesn’t look quite like the example above.
To begin, just spend a couple of minutes browsing through the individual sections in the Customizer and check out what awaits there.
Okay, next step:
3. Set a custom header
The header together with the logo are, by far, the most identifiable parts of any WordPress website.
Depending on your theme, the header and the logo might be regarded as one thing. In this case, you can handle them both in one place, but here let’s keep things standardized for most scenarios – hence separating the two.
To work with your header, go to the Customizer, and then click on the box labeled either “Header”, “Header Image”, or something similar (this changes from theme to theme).
If it’s your first time there, you’ll probably see something like this – aka not much:
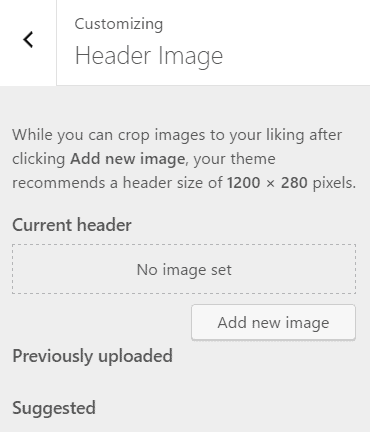
To begin, just click the “Add new image” button. This works just like the standard WordPress uploader for media, nothing fancy.
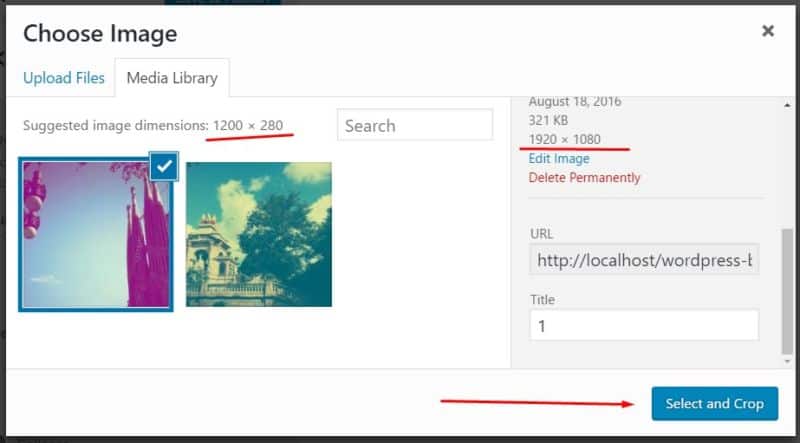
There is a small caveat, though. You’ll notice that WordPress suggests certain image dimensions for the header image. Example:
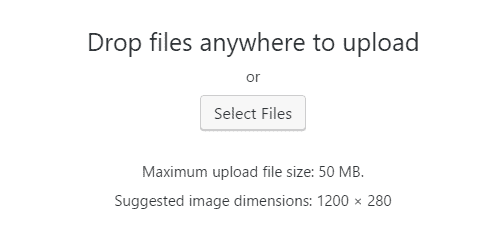
Depending on your theme, those numbers will vary. Now, the caveat is not to pay attention to that at all.
Yep, you’re reading this right.
What you actually do is always try to pick a high-quality, high-resolution image, and then scale it down afterwards using WordPress’ own tools.
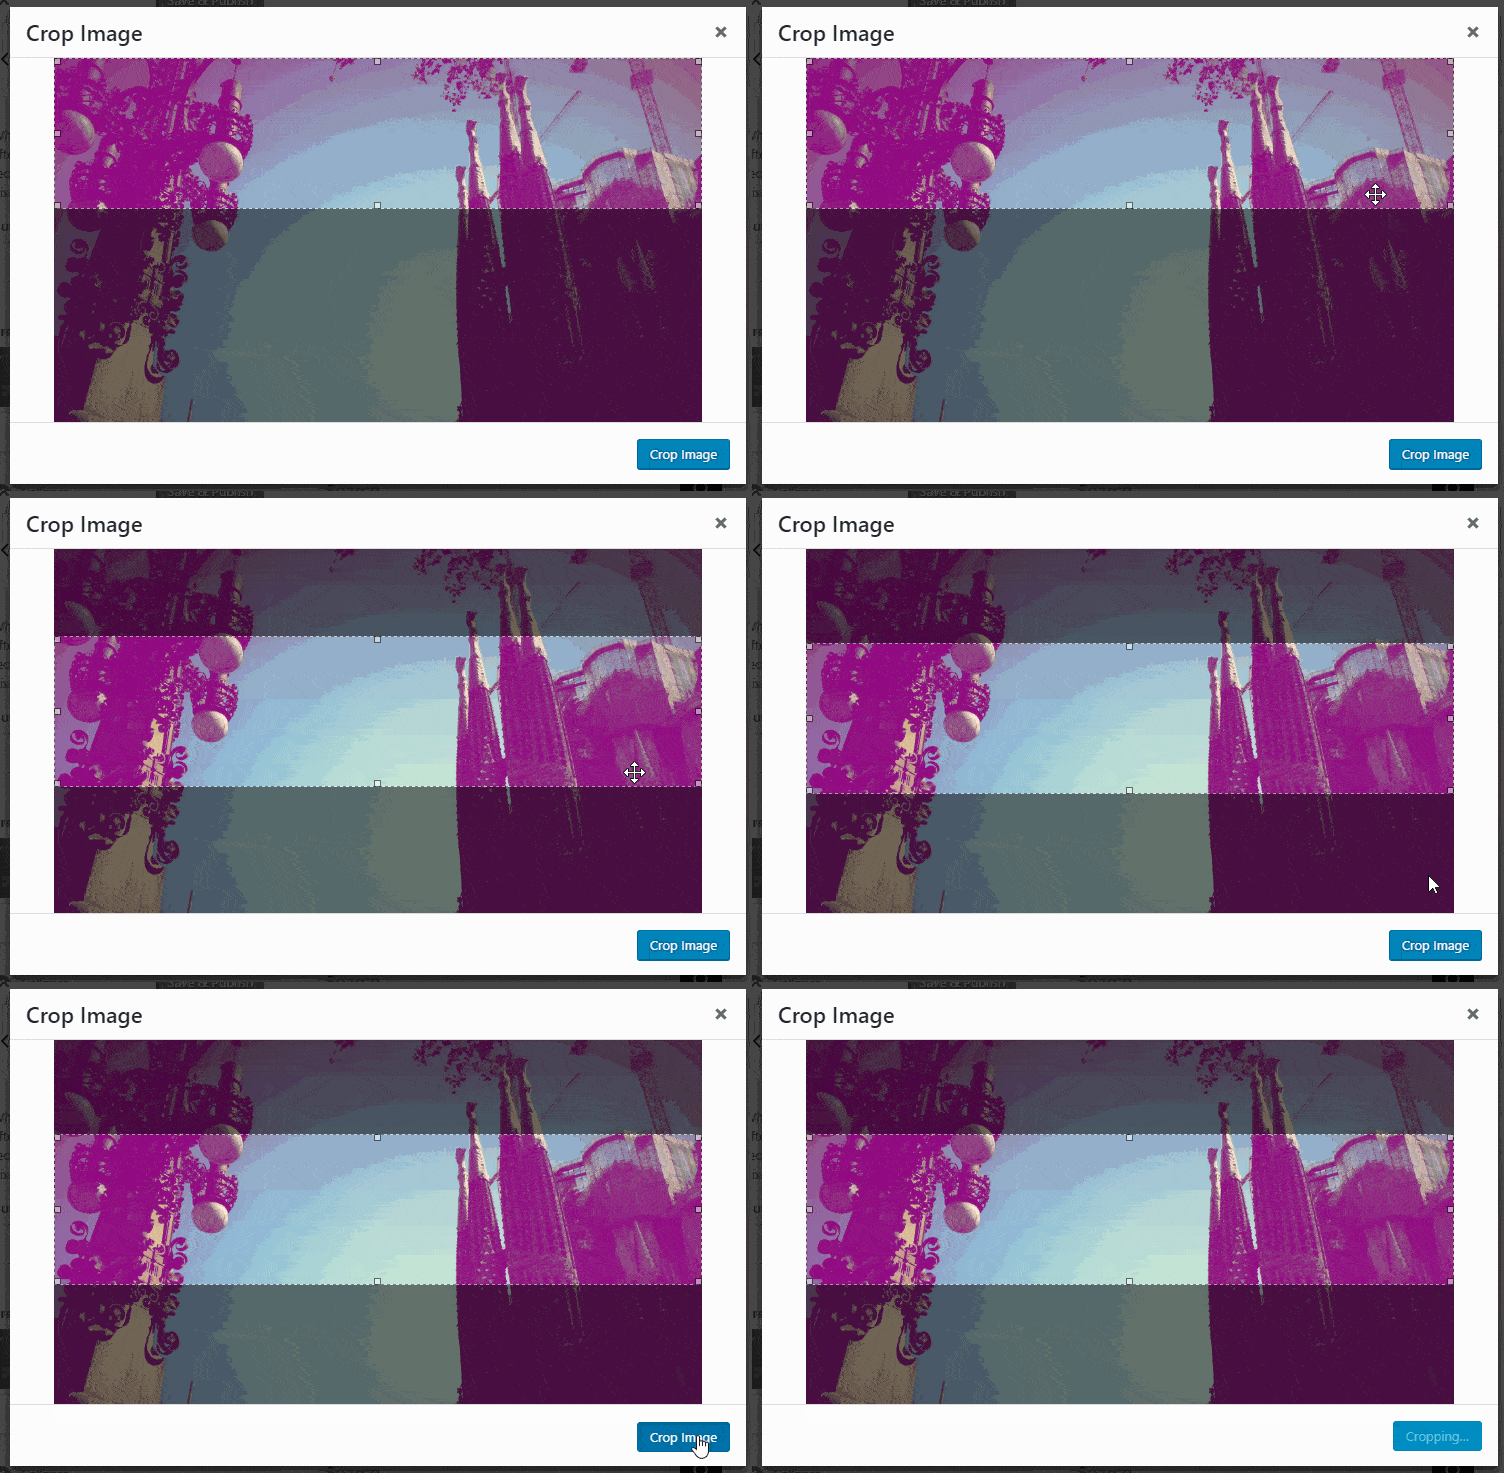
For example, I went with a nice image that’s 1920×1080 – so more than the recommended dimensions. After uploading it, I just click “Select and Crop”:
At this point, WordPress provides me with its own set of tools for making sure that my image fits the theme’s space limitations:
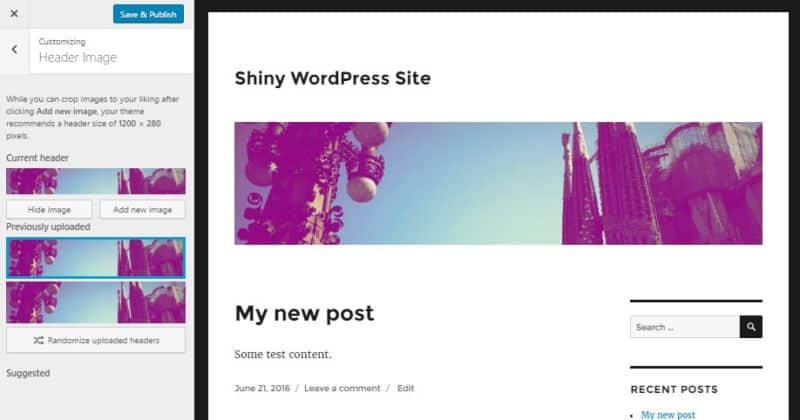
And just like that, I have a header image:
4. Set your logo and favicon
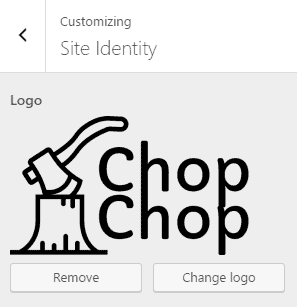
To set/upload your site logo, go to the Customizer, and click on the box labeled “Site Identity” (unless there’s a dedicated box labeled “Logo” or something similar).
There, you’ll see this:
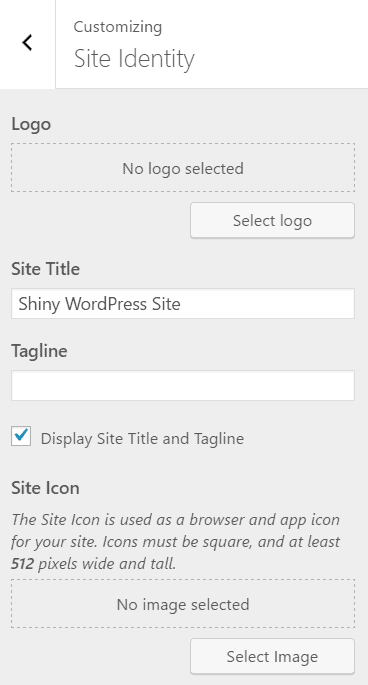
Two things we’re going to do here: (a) set the logo, (b) set the site icon.
Starting with the logo. First off, setting aside all the marketing and branding qualities of your logo, from a purely technical point of view, a good logo should be saved as a transparent PNG file (as in, without a background). Once you have such an image, just upload it by clicking on “Select logo”. You will again get to use WordPress’ tools for cropping and adjusting the final image. Here’s my result:
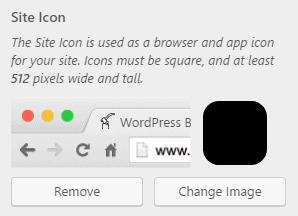
The next step is setting the site icon, also known as Favicon. Traditionally, the best idea is to take your logo, remove any text from it, and then set it as the site icon. This works well because site icons occupy very little space in the visitor’s browser bar, so the simpler they are, the more readable they will be.
To upload your site icon, just click on “Select Image” in the Site Icon section of the sidebar. Once done, you’ll see something like this, along with the preview of the icon:
Don’t know how to create a Favicon? Use those favicon generators instead.
5. Adjust colors
Some WordPress themes let you customize the default colors used for things like the website background, links, main texts, secondary texts, and more, depending on the specific theme.
You can do this all in the “Colors” section of the Customizer:

Apart from that, you can also choose from some pre-defined color schemes – visible in the image below.
I encourage you to experiment with this and select colors that go along with your business identity and branding.
6. Set a custom background
At this stage, most WordPress themes support customizable backgrounds, which includes not only setting the colors – as mentioned in the previous point – but also custom background images.
This is done in Customizer’s “Background Image” section.
Once you pick up a background image from your hard drive, you’ll see this:
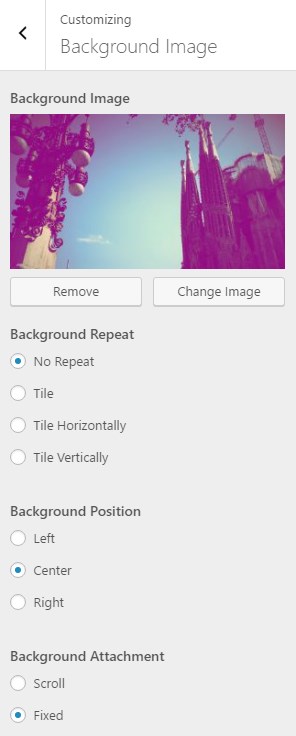
Some important details:
- Background Repeat – this defines what happens when the visitor scrolls down the page and eventually runs out of your background image.
- Background Position – pretty self explanatory, but switch between them to see the difference.
- Background Attachment – here, Scroll means that the image will scroll along with the rest of the site content. Fixed means that the image will always stay in one place.
7. Additional theme-based customizations
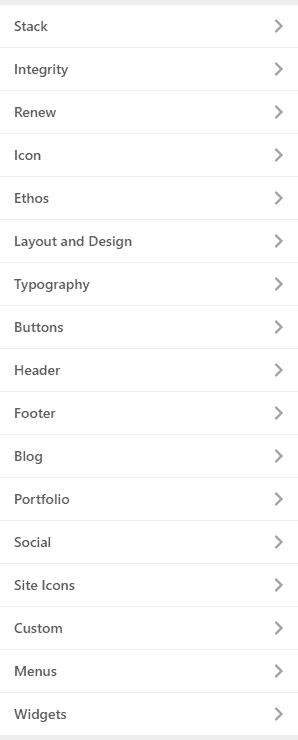
Since there are thousands of themes available out there, and many of them add their own blocks to the Customizer, covering all imaginable possibilities in this guide is simply impossible.
So at this point, I just want to encourage you to browse through all the Customizer sections available in your current theme, and experiment with what you find there.
Just to give you an example, here’s how many additional Customizer sections you can come across in some of the more feature-rich themes:
8. Plugins to use for theme customization
Here’s a list of other useful theme customizations you can enable by installing some interesting plugins:
- Page Builder by SiteOrigin. Great for adding entirely custom content elements and custom layouts to your pages and posts. One of my favorite plugins.
- NextGEN Gallery. Create and showcase great-looking image galleries.
- Content Views. Nice plugin if you want to display your blog posts as a grid, rather than the standard WordPress list.
- Unique Headers. Create original headers for individual posts and pages.
- Shortcodes Ultimate. Add custom content blocks to your website content (such as buttons, lightboxes, lists, tooltips, and more).
- Portfolio. Use it to showcase your work / projects. Great for business websites.
- Related Posts. A very nice way to display links to related content right below your posts.
- Custom Sidebars. Create unique and customized widget areas throughout your posts and pages – more than what’s available in WordPress by default.
- Easy Google Fonts. Truly awesome plugin if your current theme doesn’t allow you to change the default typography.
- Strong Testimonials. A cool plugin to have if you’re running your WordPress site for a business purpose and you’d like to showcase testimonials from your clients.
- Simple Custom CSS. Last but not least, a really useful plugin if you want to get into some more advanced customizations involving tweaks to the CSS styling of your site.
3. Set up “Menu” and “Widgets”
I don’t think there are many websites out there that don’t have any menus at all. Maybe those small, business-card-like one pagers, but that’s really not the effect we’re going for in this guide.
So … you need menus!
Here’s how to work with menus in WordPress:
Go to your wp-admin / Menus. This is where everything takes place. Begin by checking the individual pages that you want to have in the menu, and then click “Add to Menu”, like so:
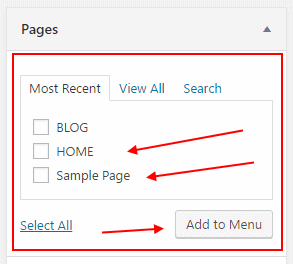
At this point, you will see your new pages on the right-hand side. The cool thing here is that if you want to rearrange the pages, everything works with drag-and-drop. But the main thing to do here is to assign the menu to one of the available locations and save it. Like so:
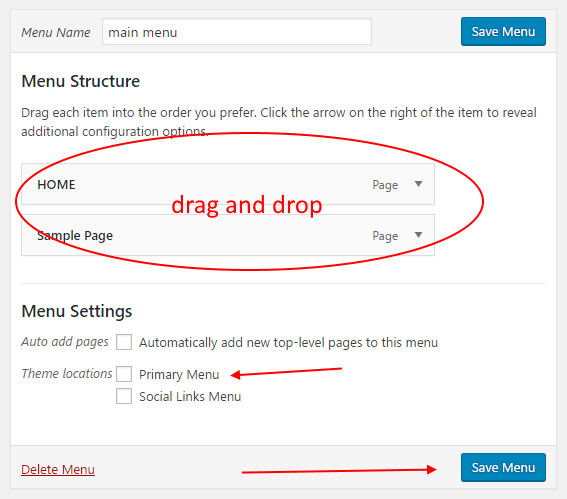
Right now, you have your new menu created and assigned to the main menu area.
For more variety, you can also create separate menus for things like your social media profiles, or anything else that makes sense. WordPress doesn’t limit you in any way here.
But where to display all those additional menus? – you ask. This is where widgets come into play.
All WordPress themes come with at least one widget area, but usually more. Widget areas define the specific spaces within your theme design where you are allowed to display custom blocks of content.
You can see what this is about by going to wp-admin / Appearance / Widgets. There are available widgets on the left, and widget areas on the right. What you do is quite simple: just grab a block from the left and drag and drop it somewhere on the right.
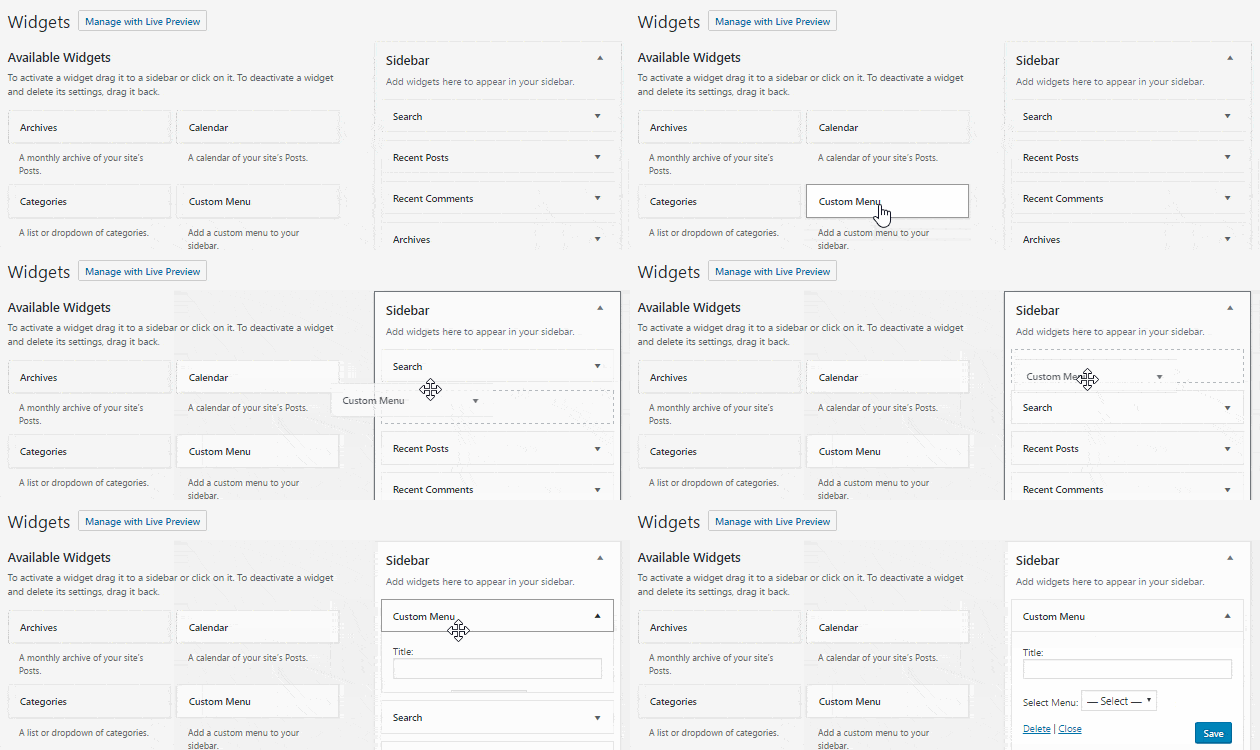
Really cool stuff, and easy to use. Following this path, you can, for instance, take all of your additional menus and display them as widgets.
But widgets go actually way deeper. I highly encourage you to check out the widgets you currently have available (depends on your theme and plugins), and see what cool stuff you can place throughout your site design to make it more interesting to the readers.
3. Confirm Your Website is “Mobile-Friendly”
Please bear with me as I say this, but in my opinion, making sure that your website is optimized for mobile viewers is more important than making sure that it’s optimized for desktop.
It’s not that I wholeheartedly believe in the principle itself, but I do believe in raw data. It just so happens that mobile traffic is now bigger than desktop traffic (data confirms). This means that by not having a mobile-optimized site, you’re potentially losing website traffic.
Okay, enough preaching. So what to do?
First, you need to check if your current design is mobile-friendly. There are a couple of ways to do that:
1. Go to automated tests.
Two popular solutions include:
There’s no inferior tool among these two. It’s a good idea to use both, and see what they have to say about your site.
Simply go to any of the above, enter your website URL, and wait for the results. Takes only a minute.
If you’re lucky, both Google and Bing will say that your site is optimized. That’s good. You can stop reading this section of the guide.
If not, you will be given some suggestions and tips on what you can do to improve the situation. I’m not going to go through those here, since every website scenario is different, and anything I’d share here wouldn’t be applicable in most cases. So in short, just follow the tips given by Google and Bing.
Note. It’s worth to check not only the main URL of your website – the homepage – but also a small set of subpages, particularly:
- your blog listing,
- example single blog post,
- example single page,
- any custom landing page you have.
2. Do manual tests.
You can carry out the manual tests yourself. They are more about your own subjective impression of the site’s mobile-friendliness, rather than data-based calculations.
To begin, go to the WordPress Customizer. There, take a look at the bottom left corner:

Those buttons allow you to switch between common device sizes, so you can see how the site behaves. It’s a very handy tool, and it lets you see if everything is in order. Make sure that:
- all texts are readable,
- images aren’t too big or too small,
- ideally, there are no horizontal scroll bars,
- the balance between image size and text size is correct (so one is not overpowered by the other),
- the menus work properly (sometimes it’s an issue with mobile design).
Apart from WordPress’ own tool, you can also use the options available in the Chrome browser. To get the goods, go to the main menu and access the “Developer tools”, or just press Ctrl+Shift+i on your keyboard (Win).
From there, you can click the “Toggle device toolbar” button:

After doing so, you will be able to alternate the viewing mode between specific popular devices. For instance, you can view your site like it appears on the iPhone 6 Plus, iPhone 5, Nexus 5X, and more.
I encourage you to use both Chrome and WordPress’ tools to really examine how your site behaves, and check if everything is in order.
3. Fix things
If your current theme doesn’t pass the mobile-friendliness test, unfortunately there’s not much you can do without getting your hands dirty and going through a lot of source code.
In an extreme scenario, you might have to pick another WordPress theme. After all, if a theme is not mobile-friendly approaching 2017, it doesn’t look good on its reputation.
But don’t panic! You can still experiment with the following. There are two alternative paths you can take if you don’t want to change themes:
(a) Experiment with “tune-up” plugins:
- Easy Google Fonts – This one I already mentioned earlier. You can use it to change your typography settings in order to make texts more readable on mobile.
- Responsive Menu – It’ll help you fix your menus and make them mobile-friendly.
- Adaptive Images for WordPress – It’ll help you load your images more effectively on mobile.
(b) Get a mobile plugin:
There’s a plugin called WPtouch. Once enabled, it checks every visitor coming to your site, and if they’re on mobile, it displays them a separate, alternative version of your site design.
Again, it takes over the appearance of your site on mobile completely, so your visitor no longer sees your current WordPress theme.
If you don’t want to change your main theme, and your site is still not mobile friendly, then the WPtouch plugin is probably the best solution.
5. Set Up Your Homepage
For a long time, WordPress has neglected the whole idea of homepages altogether. Your only options were to either have the default blog listing as your homepage, or to take one of your standard pages and assign it as the homepage.
These days, however, we have a lot of options. Some of them coming from “team themes”, others from “team plugins”.
Let’s deal with themes first.
Depending on the theme you’re currently using, you might have some custom homepage options available. Example from a popular free theme:
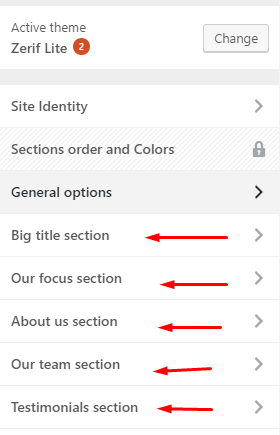
All of those sections marked here take care of customizing a specific part of the homepage. Again, those options are different from theme to theme, so we won’t get into them. I do, however, encourage you to closely examine what’s available in your current theme.
In a nutshell, if the theme offers any homepage customizations, use them as widely as you can.
If not, there’s a workaround.
Start by creating two new pages:
- call the first one HOME; leave it blank (no content); publish that page,
- call another one BLOG; also leave it blank and publish.
Then go to your wp-admin / Settings / Reading. There, assign HOME as the “Front page” and BLOG as the “Posts page”, like so:
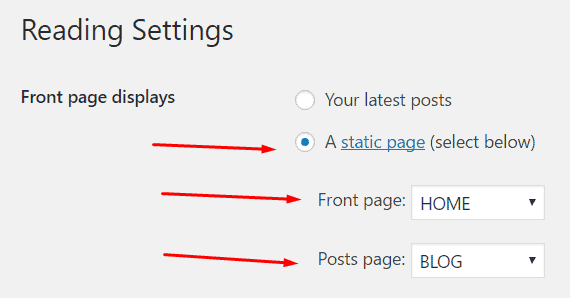
At this point, when you go to your main domain, you’ll see a blank page.
That’s where plugins come into play. If you want to keep things free and on a budget, there are two options:
- the previously mentioned Page Builder by SiteOrigin,
- and Live Composer.
I’m using the former. Once you install and activate it, when you go back to edit your new HOME page, you’ll see a new tab:
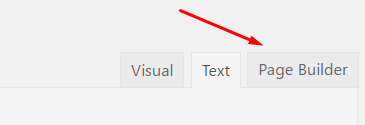
When you click it, you’ll go to the SiteOrigin builder. This is where you can set custom layouts and content elements on your homepage.
Some example content blocks you can use (just a small portion of what’s available):
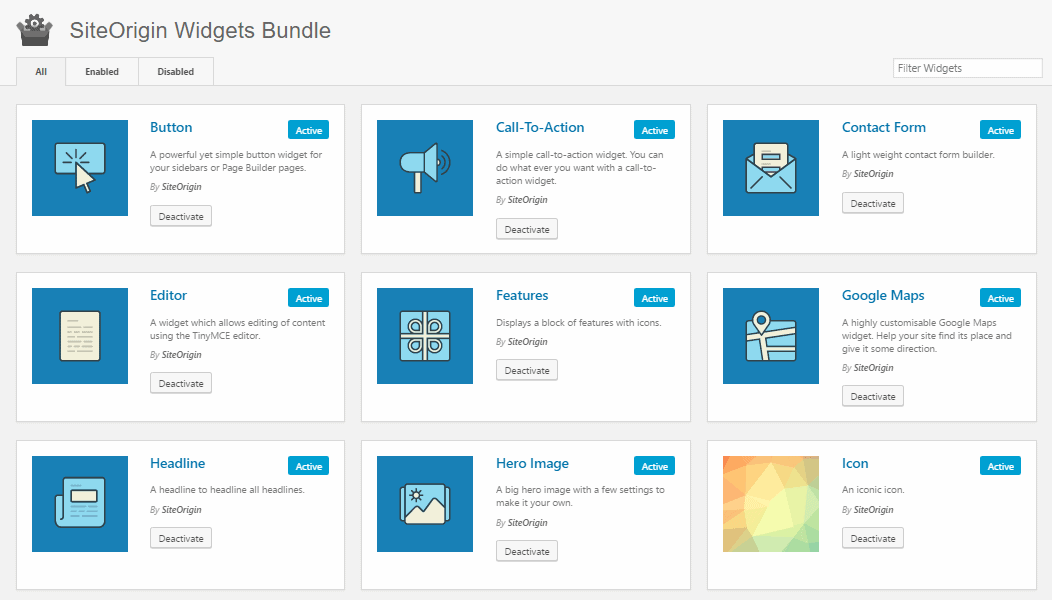
In general, I send you over to SiteOrigin’s documentation and examples. Those docs will show you how to use the plugin effectively.
Here’s an example homepage built this way:
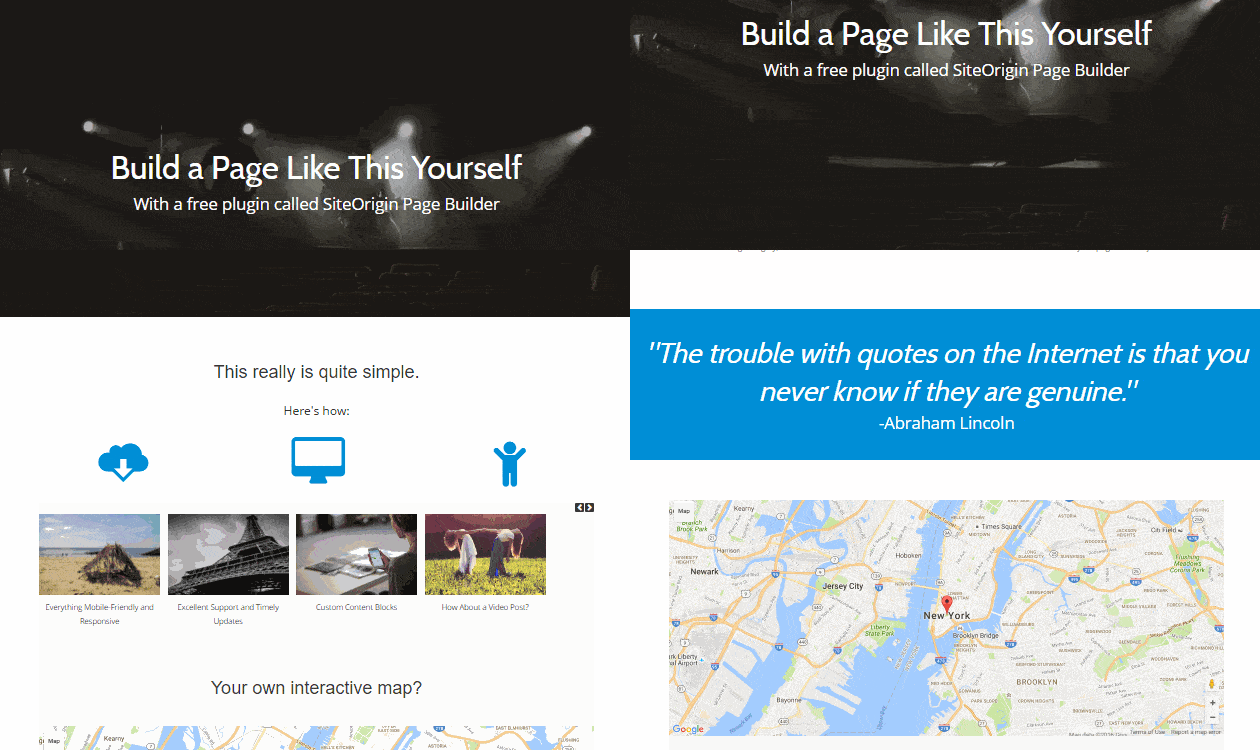
As you can see, tuning up your homepage can be a lot of fun. Generally, I don’t recommend you to work with your theme’s source code to tweak the homepage manually. Even if you somehow manage to get the visual effect that you wanted, you can never predict how the changes are going to behave once you update WordPress, or even when viewed on other devices. Working with your theme’s or plugins’ native features doesn’t cause the same problems.
6. Create IMPORTANT Pages in WordPress
Speaking of the homepage, it’s also worth mentioning what other pages you can use on your WordPress site apart from the main one.
Here’s a quick list, mainly just headlines – I’ll let you figure out what you can put on all those pages:
- About – tell people about yourself and the site.
- Contact – let your visitors contact you.
- Portfolio.
- Services and products.
- Team.
- Getting started – tell people where to get started with your content.
- Client testimonials.
- Tools and recommendations.
- Coupons.
- Content archive.
- Support.
- Career.
- FAQ.
- Advertising.
7. WordPress SEO (and what you need to do)
SEO is a crucial element for most websites on the web, and also a crucial part of website customization. Frankly, without SEO, it’s more difficult for your audience or customers to find you via Google. Not good!
Now, there are two sides to SEO:
- On-page SEO.
- Off-page SEO.
Off-page SEO is about everything you do outside of your site … things like talking about your brand elsewhere, convincing people to link their site to yours, getting social media shares for your content, etc. Let’s leave that for now.
On-page SEO is about everything you can do to optimize your individual WordPress pages to be more Google-friendly. This is what we’re going to cover here.
WordPress comes with some built-in SEO optimizations, but not a lot. That’s why you need a plugin to boost things up. The most popular and the best one is called Yoast SEO.
That plugin is incredibly feature-rich. To cover all those features here would require a guide of its own, so I’m just going to focus on the absolutely crucial stuff, and then let you do further reading/tuning-up if you’re interested.
Let’s begin with going to wp-admin / SEO. Then switch to the “General” tab, and view the introduction tour. It will explain how to work with the main sections of the plugin to make your WordPress site optimized.

After that, go through each of the other tabs and provide the info you’re asked for. The “Webmaster Tools” tab is particularly important as it allows you to hook up your site to the Google Search Console and Bing Webmaster Tools (both deliver crucial insights about your site’s SEO health).
Next, go to wp-admin / SEO / Titles & Metas, and fill in all your preferred page titles and meta descriptions. This helps to optimize the default versions of those pages. If you’re not sure about some of the toggle switches, you can safely leave them with their default values.
The next section – wp-admin / SEO / Social – is where you can hook up your social media profiles, and enable both Facebook Open Graph and Twitter Cards – those will help you get your content more visible on those platforms.
Next, go to wp-admin / SEO / XML Sitemaps. Basically, the only thing you need to do there is make sure that the sitemaps are enabled (the top toggle button). XML sitemaps are used by Google to navigate your website, and eventually get to your individual posts and pages.
At this stage, you’re pretty much done with the main settings, but you should also have a look into your individual posts and pages, and tweak their specific SEO parameters too. In short, when you go to edit any post or page, you’ll now see this box at the bottom:
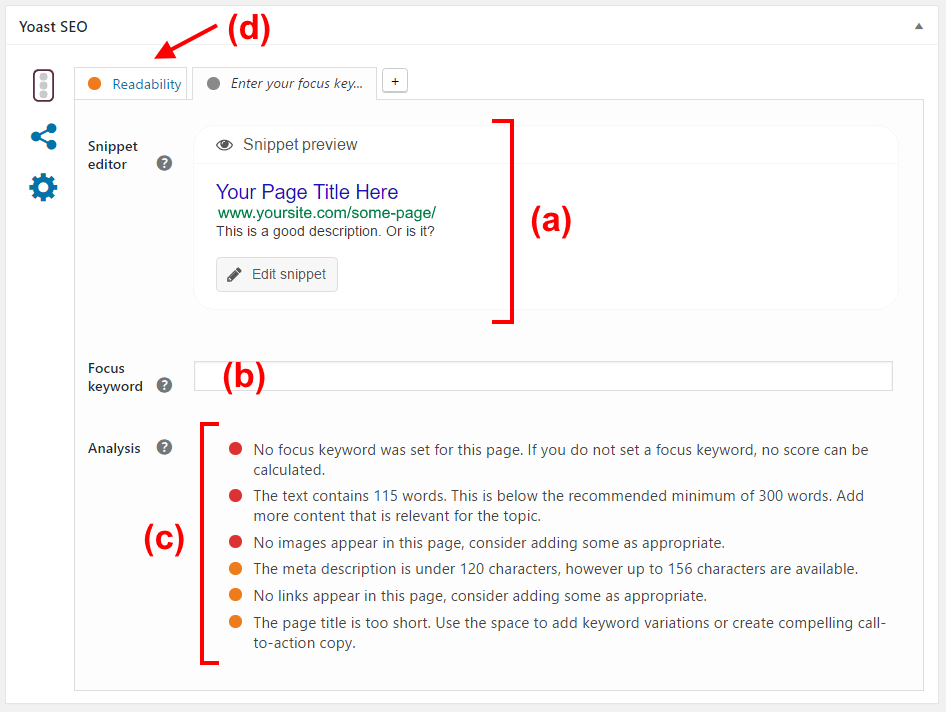
- (a) – the main SEO snippet that’s visible in Google searches. Tweak this first.
- (b) – the main focus keyword of the page. Set it to the phrase that’s the most important for you when it comes to that specific page.
- (c) – tips on how to optimize your page based on the focus keyword.
- (d) – additional tab offering tons of useful tips on how to improve the page’s readability.
Note. It’s crucial to tweak the SEO parameters for your most important posts/pages, including the homepage!
8. Add Social Media Integration
The last thing we’re going to take care of when it comes to tweaking and customizing your WordPress site is getting some proper social media integration!
Social media is just essential. It’s how a big part of your audience ever finds your content, and it also has an impact on your SEO (this has been proven by Moz.com some time ago).
Long story short, your goal with social media integration is to:
- make it easy for people to share your content,
- make those individual shares optimized,
- share content yourself effectively and at the right time,
- be on all the main social networks,
- make it easy for people to follow you,
- track your social media popularity.
Here are the tools that will help you do so:
- Share/like buttons. The best way to get yourself some of those is to use the Share Buttons & Analytics by GetSocial plugin. It’s free, and it gives you a set of very good-looking and functional buttons for all networks. Plus, you can place those buttons in various places through your site design (no matter what theme you use).
- Posting your content automatically. A very neat trick you can implement to make your work with social media much easier is to get yourself some kind of an auto-posting plugin. The one I recommend is called Revive Old Post. After a short configuration, it will pick a random post from your archives, and share it across your social media profiles.
- Make your shares look good. By default, if someone shares your content on social media, the share itself includes just the title of the post and a link to it. However, if you get a plugin like WPSSO, you can include images into the structure of the shares, plus make them much better looking and thus much more likely to be spread.
- Follow buttons. Lastly, you need some nice follow buttons that will encourage your visitors to add you as a social media friend. There’s a great generator for Twitter here, and a plugin to get a similar thing for Instagram.
Questions?
Whew, this sums up this rather massive guide. I hope that it’ll help you customize your WordPress site and make it look both awesome and 100% like you want it to look.
If you have any questions, just submit them below or get in touch here.
